Showing posts with label Sizzix. Show all posts

Saturday, November 16, 2013

Be secretive...


Let's play
"what's in my Linnie Blooms canvas flourish pocket"...
You can't probably guess from this first picture, but maybe this next one will give you a hint.


Did you guess secret journaling? Ding-Ding-Ding...you are right!
Earlier this month, on my blog, I discussed my new adventure into an art journal...you can check it out here. I have never done anything like this before, and I must admit, it is quite addicting (like I need another crafty addiction!).


The Linnie Blooms "mixed stitch canvas book" is what drew me in. I saw one in the "real" Linnie Blooms store when I was there this summer and I knew it was something I wanted to try. You can see it on the online store here.


So, I am creating an art journal inspired by songs I love. This page happens to be a "church song", but believe, me I will be covering all sorts of music by the time this book is done. This song, "You are Mine" has a very special place in my heart because it came to me during a very difficult time. The story is one that I don't want to share with everyone, so this Linnie Blooms canvas flourish pocket is a perfect "secret keeper".
To create the pages, I covered them sloppily, or should I say "creatively" in white and then metallic gold acrylic paint. I added some gold glitter gel, a pearl embellishment, some doilies die cuts (Sizzix decorative doily), lace, patterned paper, and fabric scraps. I attached and covered all of these additions with Mod Podge.
 
 
For the pocket, I used a stencil from Crafter's Workshop, and then spritzed my own mixture of gold metallic acrylic paint, Create a Shade Pearl Paint from Close to My Heart, and water to get the design. The color is subtle, but still has enough contrast to really stand out. I used Fireline, (which is really thin beading wire), to string on a few seed beads (clear, silver, and irridescent white) to embellish and create a border around the pocket. The pocket is attached to the journaling page with a delicate pearl pin from Maya Road.

So, what are you going to put in your secret pocket?


~Kelly


Pin It

**Remember...just for my beloved followers, I have a SUPER discount code for you. If you want to place an order at Linnie Blooms online store, you can shop here... http://lindabarutha.com/shop/. Use the code LB2013KS and you will get 10% off your order. Enjoy!


Friday, September 6, 2013

Be a friend...


I'm continuing my love affair with Linnie Blooms canvas shapes, and this time I am playing with a "long canvas blank".  It is a layer of cotton batting between a blank cotton canvas and a printed cotton layer on the back, size 12"x5".


Just like the other smaller Linnie Blooms shapes that I've played with before, I love the way this texture absorbs any medium I throw at it.  Today---acrylic paint! I used some Scotch blue painters tape and created a chevron pattern.  I did not measure---just laid down the tape in what looked like straight chevrons to my eyes.  I like the way it looked when I aligned them off center.  Make sure you push down hard to adhere the tape to the blank so that you don't get any seepage.


I spread the acrylic paint directly on the canvas with a foam brush using a light gray and canary yellow.  As you can see, there is no need to be neat about it!
I ripped the tape off (I didn't even wait for the paint to dry) to see how it turned out and was so impressed that the lines were so sharp.


To create the jar, I traced a clip art jar shape onto some velum paper and cut it out.  I inked the edges and then highlighted the thread and reflection lines with some Rock Candy Stickles.  I attached the jar to the canvas by sewing on a few stitches (can't have any adhesive showing)!  It's difficult to see in the photo but there are wire stems wrapped with twine that I hot glued to the back of the felt flowers--they run down into the jar so the flowers don't look like they are just free-floating.

Yes, those are Linnie Blooms leaf shapes in between my felt flowers (a Sizzix die).  I swiped some Distress Stain on those leaves to add a splash of color.  Then, I plucked some random buttons from my stash and slid a few seed beads onto the threads as I attached the felt flowers to the canvas. 

Lastly, I printed the sentiment on some cute pink/khaki gingham paper.  I dried the ink with a heat gun to make sure it was really dry before painting a layer of Modge Podge over it to add some texture. 

I loved this project SO much, that I've decided that this was the first in a series of seasonal blanks.  Coming soon---fall!  I better hurry, it's already September!


~Kelly


Pin It


Tuesday, August 27, 2013

Be hopeful...


Unfortunately I have had to send 2 sympathy cards in the last few weeks.  I have always loved this sentiment...
 
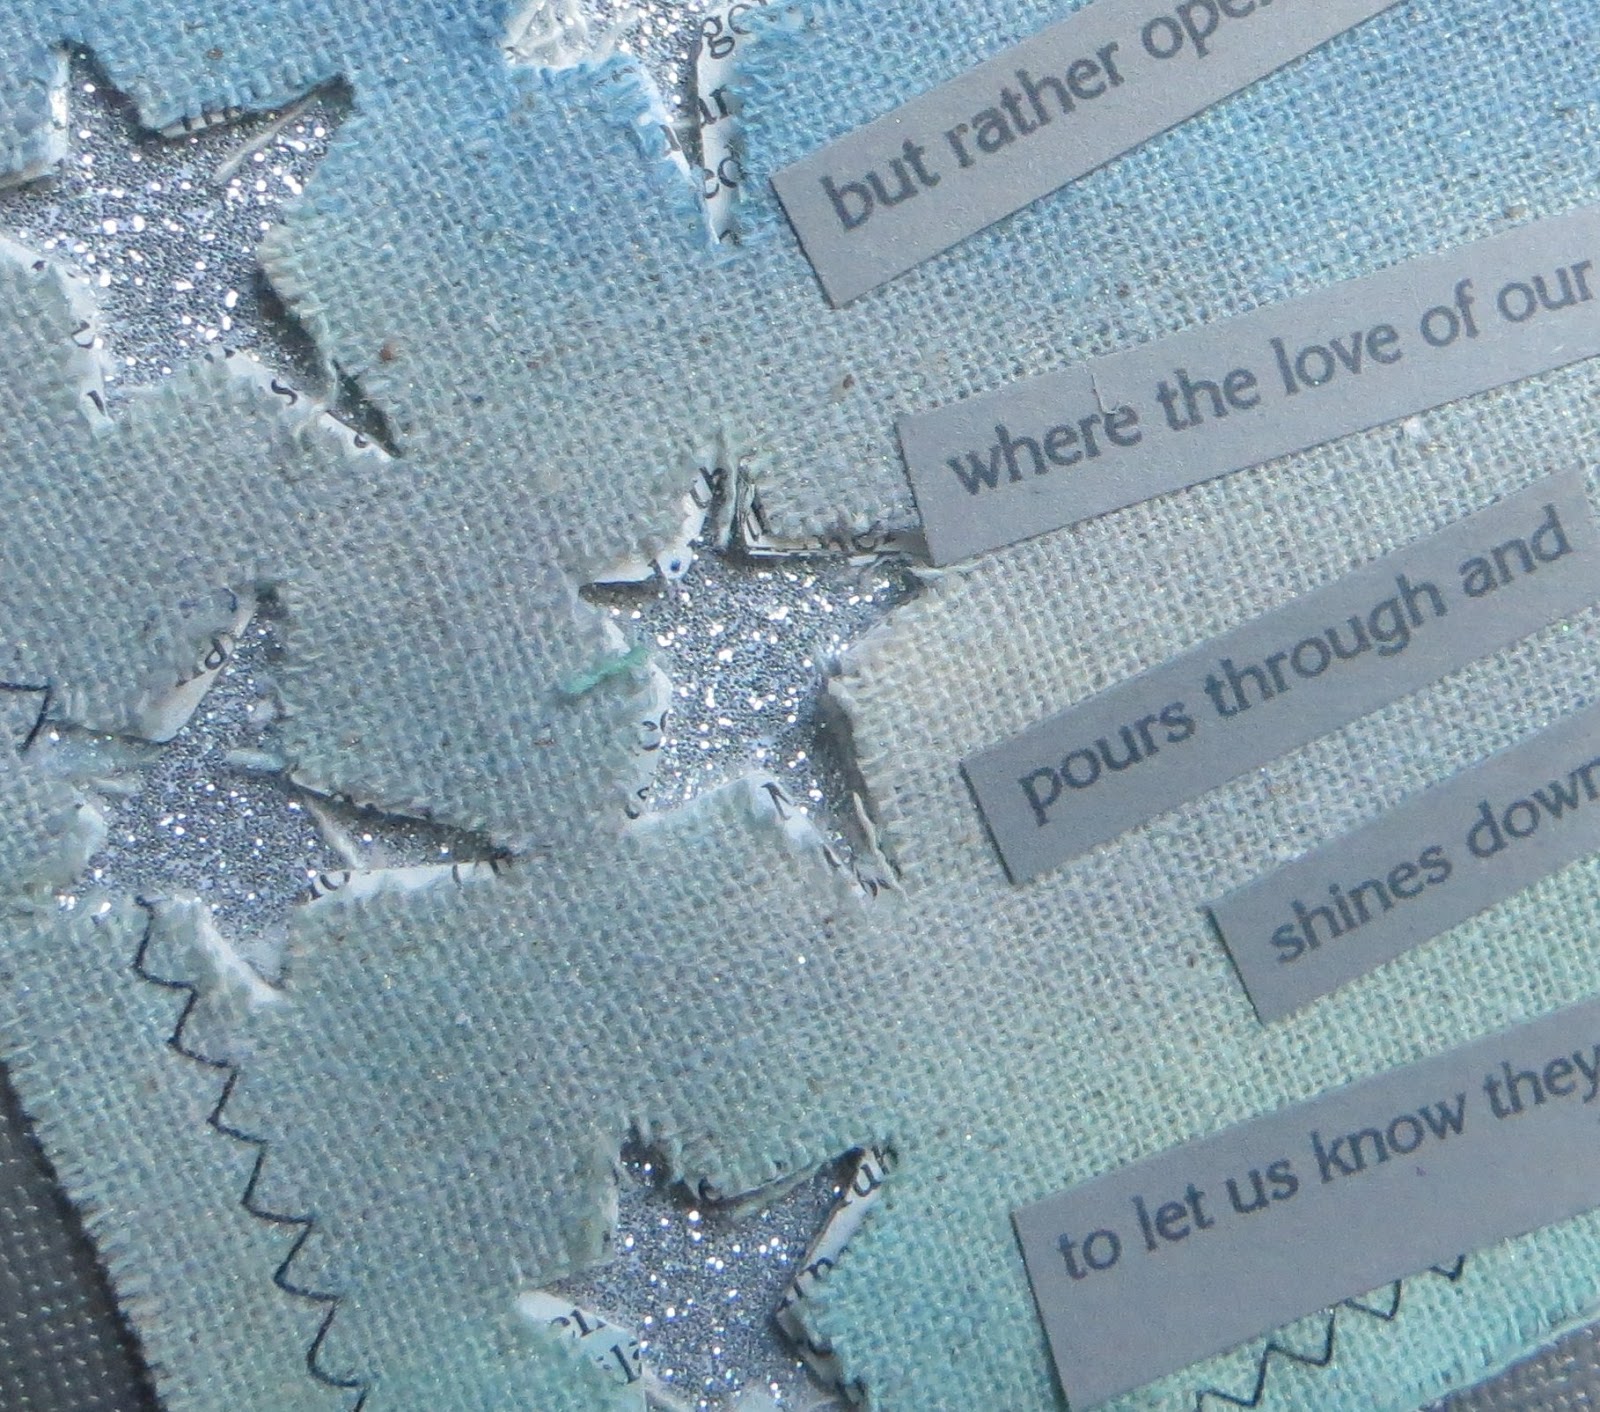
 "Perhaps they are not stars, but rather openings in heaven where the love of our lost ones pours through and shines down upon us to let us know they are happy." 
 
It is a message of hope when it doesn't seem like there is a lot of hope around.


This week, over at the Linnie Blooms Blog, we are challenging everyone to use Distress Inks.  The Design Team is continuing to show the endless versatility of the Linnie Bloom canvas shapes. 
 
I applied Distress Stains (faded jeans, weathered wood, and tumbled glass colors) directly to the canvas overlapping the shades a bit.  I spritzed with a little water to facilitate them to bleed together and then spritzed with some Close to My Heart Pearl Paint (that I mixed with water and put in a spritz bottle).   
 
When it dried, I cut stars into the square using my Sizzix paddle punches (remember those?)  I like the way it caused the stars to fray (and I pulled a few more string to get them to look even more distressed).  I placed some silver glitter paper behind the canvas to make it look like the love in the stars was really shining. 


I loved the way this card turned out.  But I am hoping that I won't have to make anymore sympathy cards for awhile.
 
Hopeful.
 

~Kelly


Pin It


Don't forget to show us how you use your Distress Inks over at the Linnie Blooms Blog.  The challenge ends August 31st.
 

Friday, August 2, 2013

Be a memory keeper...


I am the memory keeper of the Starsky family.  It's the reason I am not in very many photos.  It's the reason my children roll their eyes everytime I say, "wait, let me get my camera".   It's the reason I have a page of quotes from our family on my ipod.  It's the reason I scrap. 


The challenge this month at Scrap It Girl is MINI-BOOKS.  It was the kick I needed to make this family dictionary that has been an idea in my head for a VERY long time.


I used this fabulous paper from My Mind's Eye for the front and back covers.  I covered these wood rounded rectangles from my stash with the paper-- making sure I spread the glue thinly all over, right up to the edges (I used Tacky Glue).

 
I sanded the edges to make sure the paper and the wood were like one.
 
 
Then, I inked the edges.


Then, the fun part.  I cut lots of papers into 4x6 cards and typed the definitions of all of our family sayings.  It's all of our "secret codes" and all of the phrases, sayings, and names we have for things that are unique to our family.  We had kept a list on the fridge for about a week and just kept adding to it when we remembered one.  I used paper colors that coordinated with my front and back cover (turquoise, aqua, olive, lime, kraft brown, etc.)


I used my sticker stash for the word/phrase at the top of each page.  What a great way to use up my stash of alpha stickers (however, my stash doesn't appear to look any smaller--hmmm).


On some of the pages I added washi tape or a piece of ribbon or paper trim. 
 
On the top or side of each page I added a shape, tag, tape, or border and then glued two cards together (so the tags and shapes stick out between the two cards).
 

After decorating the front cover with some Sizzix alphabet letters, I punched holes in all the cards, drilled a hole in the covers with my Fiskars Hand Drill , slid in a ring, and tied a few ribbon scraps on the ring.

So, now it is your turn.  Make a mini!  Take the Scrap It Girl August Challenge--there is a great prize pack too!

~Kelly


Pin It


Tuesday, July 30, 2013

Be a participant...


You still have a little time to join in the "Red, White, and Blue" Challenge over at Scrap It Girl.  I created this card with some Sizzix Sizzlits strip dies (Groovy Girl alphabet, Strips, and Tim Holtz Mini Snowflake Rosette--who said you couldn't use snowflakes for 4th of July?).

You can find inspiration and more information at the Scrap It Girl website, found HERE.


So, are you a participant?  Are you really participating in your life?  Or are you more of a "parade watcher"?  Viewing it all go by but not joining in.  Going through the motions of the day to day and not living life by it's depth. 
 
It's time--I often need to tell myself too.  It's time. 
~Kelly
Pin It

Wednesday, May 22, 2013

Be a saver...


I saved all of these scraps of paper from the recycle bin.  These were all little bits of scraps that I punch into circles.  A great way to spend a day at a scrap.  I didn't pack the HUGE amounts of stuff (that I pack and never use).  One bin of blank cards, a few punches, a rosette die and Sizzix Sidekick, and a bunch of scraps.


Using one design to create all of these cards made it much easier to chat while working . 
Mindless creating...I LIKE IT!
 

What have you been saving your scraps for lately?


 ~Kelly

Pin It

Sunday, September 23, 2012

Whatever is lifted...part 1


lift

    ·raise something; to move something from one position to
another, higher position
· take something from place; to grasp something and
move it somewhere else
· cheer somebody; to make somebody happier or more
cheerful
 
In scrapbooking, lifting means being inspired by someone else's design.  In fact, being inspired so much, that you take bits and pieces (maybe color scheme, or the photo placement, or the embellishments, or the title, etc.) and infuse them into your own creation.
 
Fiskateers have their own group, called the Liftateers, that are avid "lifters".  Each week, we honor someone's page layout by putting our own spin on their design.  Liftateers are celebrating another year of lifting, by having a "Lift Off" this weekend over on the Fiskateer site.


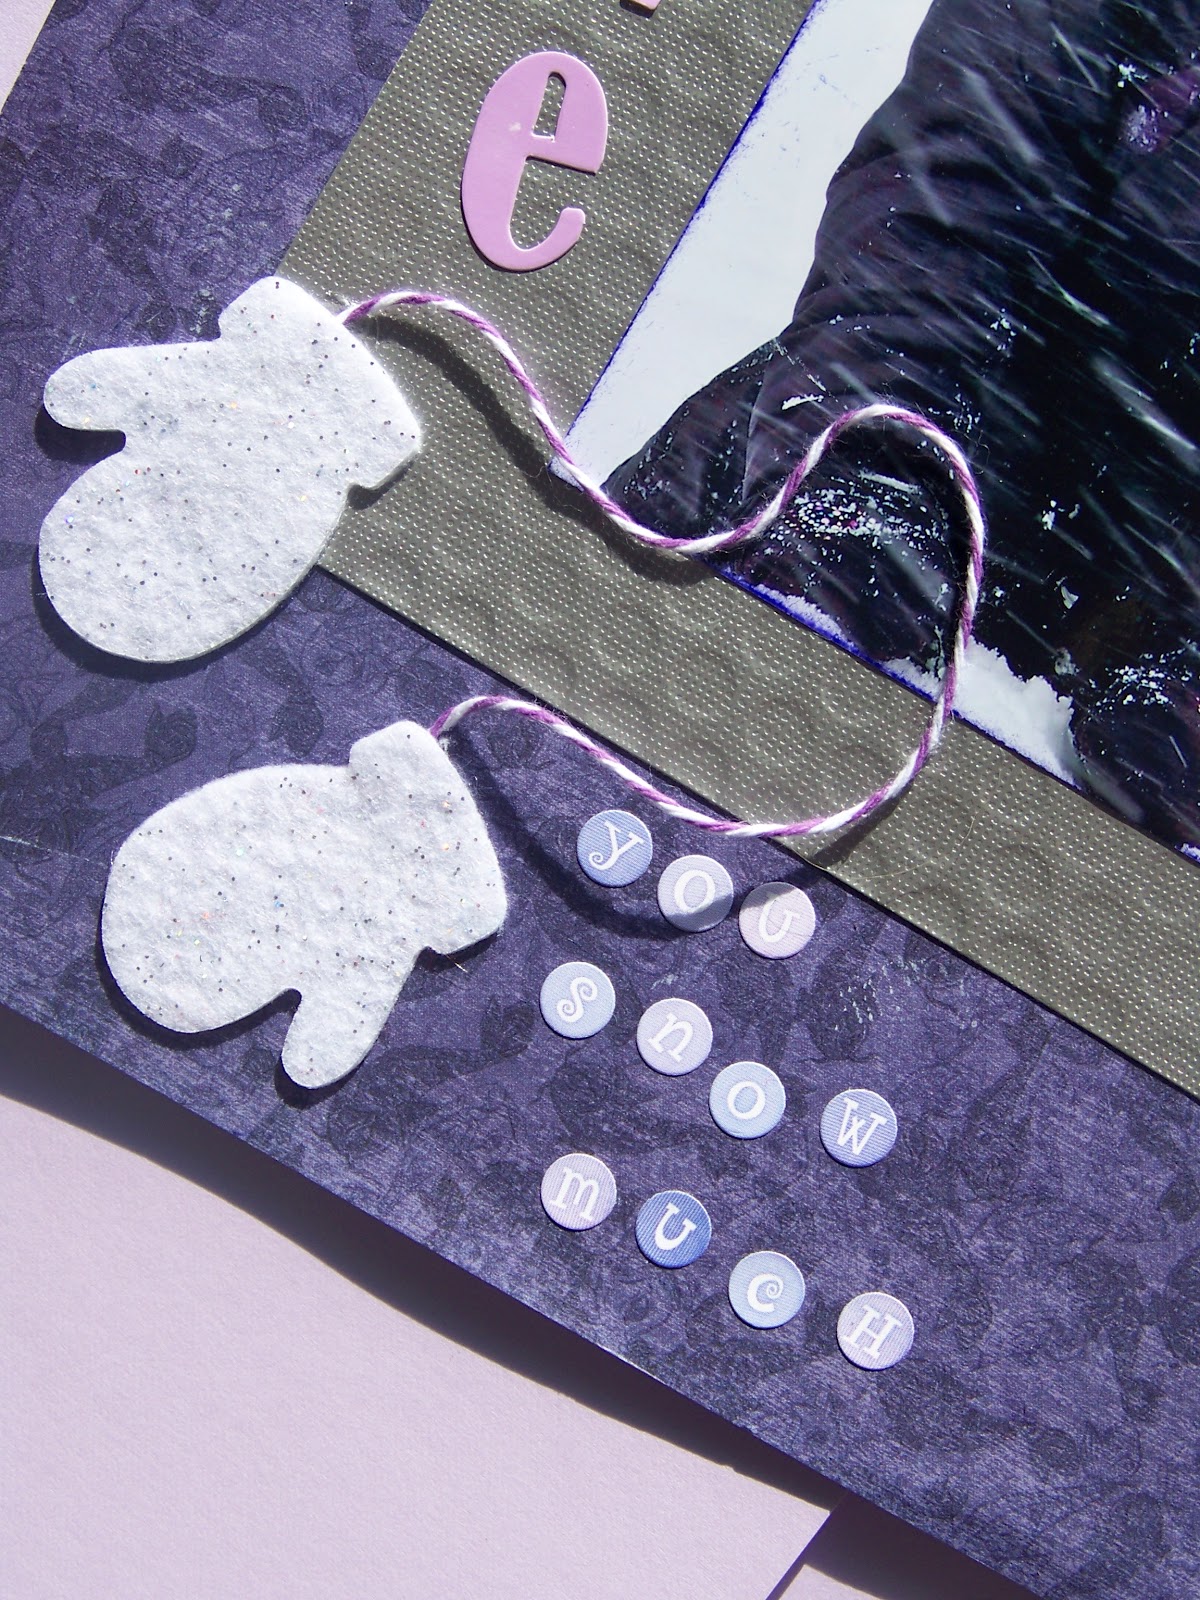
I am hosting the "Lift MORE Love" challenge.  I lifted this layout design from Carol's page (seen here ). As you can see, I kept the stamping that Carol had behind her picture (I love this lined polka dot pattern from Hero Arts), but changed the color scheme (hers was a monochromatic white on white) and the flower embellishments to snowflakes.

I used a Sizzix die-cut with felt to create the mittens and added some twine to connect them. It's a Sizzix texture plate that gives the silver paper its dotted embossed pattern.


From the definitions at the top of the page, you can see that "lift" also means to cheer somebody.  I don't know about you, but I would certainly feel lifted if someone was inspired by my creation! 
Part of the "cheer" comes from making sure that you go back and tell the person you lifted how much you appreciate their work, that's called "leaving love", and telling everyone where you got your inspiration from (it also prevents "lifting" from being called "swiping").  I left a bunch of love for Carol--thanks again Carol!


~Kelly


Pin It

Monday, August 20, 2012

whatever is a challenge...


Since I will never be an Olympic athlete (I feel pretty secure in saying that it will NEVER happen), the next best thing is...participating in the Fiskateer games!

This week has been the Card Making Challenge and for me, 3 out of 4 ain't bad.  Now are you singing that old Meatloaf song?


Challenge #1: Make a "window" in your card.  I used an old Sizzix fence die and punched two different size flowers with an EK Success punch--with some pearl centers, you can peek through the window and into a virtual flower garden.  It says "a bunch" on the inside.  "Thanks a bunch!".  I'm kind of addicted to these handy Cosmo Cricket alpha stickers--I have them in 4 different colors (so far).  Not much room to write on the inside with this design, but I can always use the back.

Challenge #2 is to make a card with a decorative edge--this one has 6 decorative edges(from a Fiskars border punch)!  And, since I don't "tweet", I thought this would be a good way to compensate.


Challenge #3  had me making shaped cards.  I used an old Sizzix die to cut the paper on the fold.  I stamped the petals' patterns and the sentiment with some stamps from Close to My Heart (the "Just for You" set).  I used Fiskars squeeze punches for the centers and the leaves.  (And yes, you can see my still wet Glossy Accents on the orange one.  I stuck my finger in it while it was still wet and had to re-apply).


 I  neglected yard work (again) just to participate in my kind of "Olympics".  What have you been neglecting lately to get your crafty time?


~Kelly


Pin It


Thursday, August 16, 2012

whatever is an experiment...

Longing for my days doing experiments in the college chemistry lab (NOT), I decided to do a little experiment with distress stains.  Using my non-stick craft sheet from Ranger, Tim Holtz Distress Stain (Tumbled Glass),  5 manilla tags,   1 sheet of photo paper, and some water, I set out to find out what is my favorite method for getting a watercolor effect.

Experiment #1:
-wipe distress stain on the mat
-spritz stain and mat with water
-also spritz the paper with water
-slide paper over the mat
Result: very pale coloring, because the paper is manilla, this one has almost a yellow/green tinge to its aqua color

 --------------------------------------------------------------------------------------------------

Experiment #2:
-wipe distress stain on the mat
-spritz just the paper with water
-slide paper over the mat
Result: a mottled, imperfect soft water color effect, pretty


-----------------------------------------------------------------------------------------------------------


Experiment #3:
-wipe distress stain over the paper
-spritz water on the paper
Result: Slightly more intense color than #2, but doesn't have the mottled effect, less variance in shades over the card, but still pretty


----------------------------------------------------------------------------------------------
 Experiment #4:
-wipe distress stain on the mat
-spritz mat with water
-wipe glossy sheet of photo paper over the mat
Result: splotchy swipes and dots of color, color more true to the stain color since paper base is white (versus manilla) (must have had a little bit of leftover green on the mat--oops)


--------------------------------------------------------------------------------------------------------------


Experiment #5:
-wipe the whole tag with stain
-Starting 3/4" inch from the top, wipe this bottom part of the  tag again with stain
-Keep repeating the process moving down 3/4" inch after each layer
Result: an ombre effect that is very "in" right now.  However, the bottom part of the tag (the part that recieved the most "swipes" was starting to pill and disintegrate)


-------------------------------------------------------------------------------------------------------
Experiment #6:
-wipe distress stain on the mat
-spritz mat with water
-wipe manilla tag over the mat
Result: similar mottled effect to #2, but without the swipe lines


So, do I have a favorite?  No, I like them all!  It's helpful to see what effect each method produces though.  Using Fiskars circle and cloud squeeze punches, Sizzix embossing plates, ribbon scraps, some twine, and a cute printed sentiment,  I turned these experiments into tags--perfect for attaching a gift card to the back. I like experiments.  Not enough to go back to college chemistry though. 

So, did you see my submission call for watercolor projects in the July issue of Scrapstreet ?  You can check it out here
No matter what method you use to achieve a watercolor effect (paint, stain, mists, watercolors, or something else), I'd love to see it!  The deadline is August 19th.


~Kelly


Pin It