Friday, September 19, 2014

Create for the door...


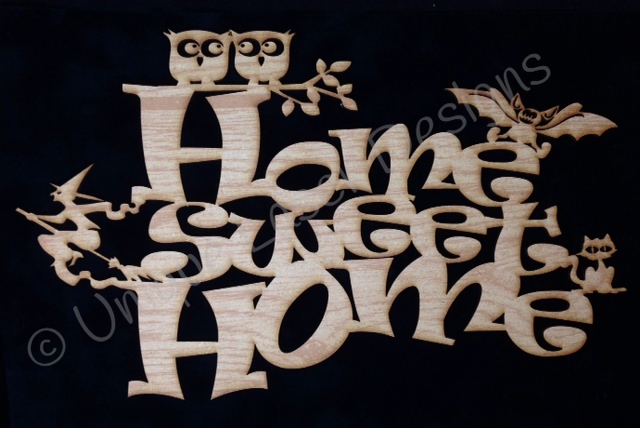
Don't let all of these colorful details scare you away from making this Halloween wreath.  You can make this wreath in about an hour with some yarn, paper rosettes, glue, micro-glitter, and this Halloween wood design from Unique Laser Designs.  First, I wrapped a straw wreath with yarn and then I moved onto the sparkly part of the project.

I covered the whole wood design, "home sweet home", with a piece of scrap paper, but revealed one section at a time.  To that section, I spread on a thin layer of glue and then sprinkled on micro-glitter. Then I moved onto a different section and a different color of glitter.  The flying witch and the bat are purple, the cat and owls are teal, and the "home sweet home" is covered in black micro-glitter (and now so am I).


 I added some paper rosettes and stars and this wreath is ready for the front door!

Halloween decorations don't have to be scary or creepy...
sometimes they can be cute and SPARKLY!

What's on your front door for Halloween?  
Nothing yet?
Why not start with something from Unique Laser Designs...shop HERE!

~Kelly

Pin It

Monday, September 8, 2014

Create old school...


Yesterday it was 85 degrees, today it is 72.  Fall is in the air, and that means it's time to go back to school.  I'm going "back to school" with my project today too.  Over at the Chicagoland Scrapbooker blog, we are going "old school" all month.  Not only did I use an old school photo of me, but the patterned paper I chose has an "old school" feel to it too. The tweed background, stripes, chalkboard alphabet, the phonics blocks, and the penmanship lined paper---all bring back those grade school memories.  

I was in school in the 1970's, so inking over a groovy circle looped stencil with a bristled brush was just one more way to return to my old school ways. Over at the Scrap It Girl blog, the challenge this month is to show us your project that includes use of a stencil or mask.  This groovy one that I used is an older one from Crafter's Workshop. Join in the challenge and you can win a prize pack. Check out more info about the monthly challenge, HERE.

Now, do you remember the popsicles that had jokes written on the bottom of the sticks and then you had to eat the popsicle to reveal the punch line?  I didn't have to eat any popsicles this time, but I thought using popsicle sticks to frame my photo was one more way to bring nostalgic thinking to this layout.  

This oak leaf and Polaroid frame (turned into a chalkboard with black paper and a white gel pen) are wood embellishments from Unique Laser Designs.  To color the the leaf, I used Twinkling H2Os (from Creative Imaginations).  In this picture, you cannot adequately see the amazing shimmer from this copper paint.  For the frame, I quickly and simply ran some Distress Stain (wild honey) over the wood to give it a hint of golden color.


Last "old school" item---an apple sticker.  I've been a sticker collector for a  L   O   N    G     time.  I think it was scratch-n-sniff smelly stickers that were my first love.  I still have a LOT of stickers, and while I don't use them as often as I used to, they are still a go-to embellishment for me.  That's my old school style. What's yours?


~Kelly

Pin It