Saturday, November 29, 2014

Create with a cookie (almost)...


At our house, the day after Thanksgiving is reserved for decorating the house for Christmas.  This year, I created something new for the kitchen, and it LOOKS good enough to eat...
but DON'T (unless you want splinters in your teeth)!


Using these adorable gingerbread ornaments from Unique Laser Designs, I made a simple garland with just some ribbon, wooden beads, and twine.


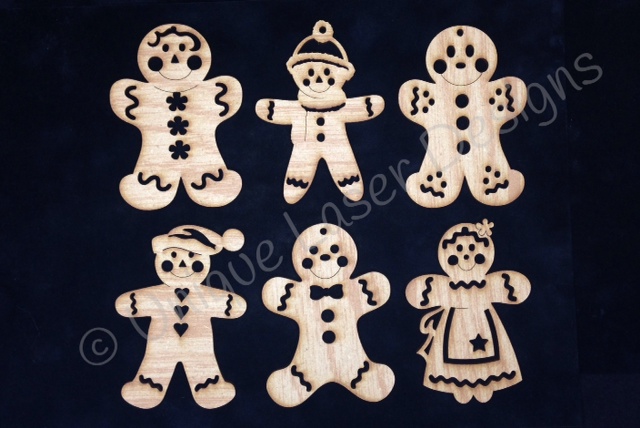
First, I covered the gingerbread men with clear VersaMark ink and then bathed them in embossing powder (Espresso from Adirondack).  When I heated them up with the heat gun, I was mesmerized as they developed this great texture that even turned a little white around the edges.  Once cooled, I added just a bit of Stickles (rock candy) on the edges to give them just a little sparkle.


I strung some painted wooden beads on some twine and then hot glued the gingerbread men on, separating them with some gingham ribbon scraps.

These guys are ready for hanging in the kitchen.  One decoration down, about 512 more to go!

My term on the Unique Laser Design Team is coming to a close, and I have truly LOVED these wood shapes.  I will keep coming back to get more with each new reveal.   

And, just for you shoppers, here is a DEAL!  35% of the whole ULD store through Monday (enter the code THANKS35 at checkout).  Stuff your stockings!


Don't forget, show us your true colors over at the Scrap It Girl blog...we want to see your projects with COLOR (paint, watercolors, gelatos) by tomorrow (Sunday).

~Kelly


Pin It


Wednesday, November 5, 2014

Create with sparkle...


Once Halloween passes, I head right into the sparkle. I don't forget about Thanksgiving, but while my mind is focused on being grateful, my hands are busy creating for the Christmas season.  And for me, this season gives me the go-ahead to sparkle sparkle sparkle.


My first sparkly project of the season uses this wooden snow globe from Unique Laser Designs as the main focus of an over-sized tag. I spread a thin layer of Tacky Glue over the whole ornament (the end of a paper clip works great for moving the glue out of the intricate designs) and then sprinkled on a heavy load of ultra-fine platinum silver glitter. I added a red ribbon to the top too.

For the base of this tag (which is 4"x5"), I covered it in white cardstock and then punched out all different sizes and shapes of snowflakes from the same white cardstock and glued them on closely and randomly.  I even let some hang over the edge and then trimmed them later when I had the whole tag covered.  

I framed the edge with some black and white polka dot washi tape and added some die-cut trees that I "snow-swiped" with Picket Fence Distress Stain.  Speaking of paints and stains, that is the challenge this month over at Scrap it Girl.  Show us your projects that you've added some additional color to (watercolors, paints, stains, gelatos, etc.)  I'm going to have some more colorful projects to share soon.

I glued the snow globe to the tag along with some song lyrics and now this tag is a perfect addition to a simple hostess gift (maybe on a bottle of wine?).


Wishing you lots of crafty time as we begin these seasons of being grateful and being sparkly!


~Kelly
Pin It