Showing posts with label Christmas. Show all posts

Saturday, November 29, 2014

Create with a cookie (almost)...


At our house, the day after Thanksgiving is reserved for decorating the house for Christmas.  This year, I created something new for the kitchen, and it LOOKS good enough to eat...
but DON'T (unless you want splinters in your teeth)!


Using these adorable gingerbread ornaments from Unique Laser Designs, I made a simple garland with just some ribbon, wooden beads, and twine.
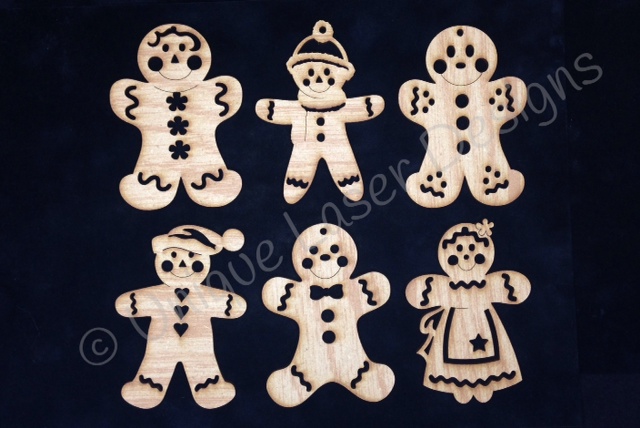


First, I covered the gingerbread men with clear VersaMark ink and then bathed them in embossing powder (Espresso from Adirondack).  When I heated them up with the heat gun, I was mesmerized as they developed this great texture that even turned a little white around the edges.  Once cooled, I added just a bit of Stickles (rock candy) on the edges to give them just a little sparkle.


I strung some painted wooden beads on some twine and then hot glued the gingerbread men on, separating them with some gingham ribbon scraps.

These guys are ready for hanging in the kitchen.  One decoration down, about 512 more to go!

My term on the Unique Laser Design Team is coming to a close, and I have truly LOVED these wood shapes.  I will keep coming back to get more with each new reveal.   

And, just for you shoppers, here is a DEAL!  35% of the whole ULD store through Monday (enter the code THANKS35 at checkout).  Stuff your stockings!


Don't forget, show us your true colors over at the Scrap It Girl blog...we want to see your projects with COLOR (paint, watercolors, gelatos) by tomorrow (Sunday).

~Kelly


Pin It


Wednesday, November 5, 2014

Create with sparkle...


Once Halloween passes, I head right into the sparkle. I don't forget about Thanksgiving, but while my mind is focused on being grateful, my hands are busy creating for the Christmas season.  And for me, this season gives me the go-ahead to sparkle sparkle sparkle.


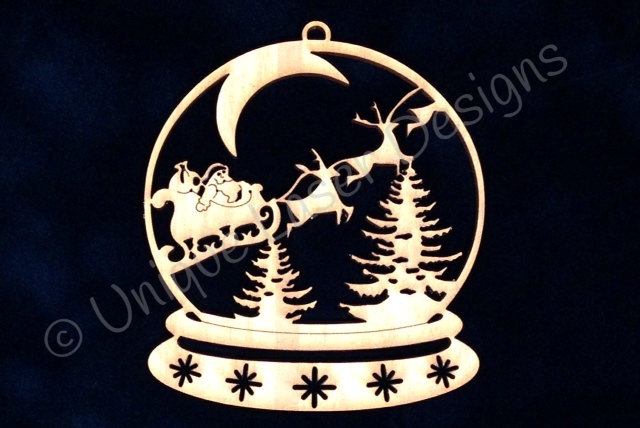
My first sparkly project of the season uses this wooden snow globe from Unique Laser Designs as the main focus of an over-sized tag. I spread a thin layer of Tacky Glue over the whole ornament (the end of a paper clip works great for moving the glue out of the intricate designs) and then sprinkled on a heavy load of ultra-fine platinum silver glitter. I added a red ribbon to the top too.

For the base of this tag (which is 4"x5"), I covered it in white cardstock and then punched out all different sizes and shapes of snowflakes from the same white cardstock and glued them on closely and randomly.  I even let some hang over the edge and then trimmed them later when I had the whole tag covered.  

I framed the edge with some black and white polka dot washi tape and added some die-cut trees that I "snow-swiped" with Picket Fence Distress Stain.  Speaking of paints and stains, that is the challenge this month over at Scrap it Girl.  Show us your projects that you've added some additional color to (watercolors, paints, stains, gelatos, etc.)  I'm going to have some more colorful projects to share soon.

I glued the snow globe to the tag along with some song lyrics and now this tag is a perfect addition to a simple hostess gift (maybe on a bottle of wine?).


Wishing you lots of crafty time as we begin these seasons of being grateful and being sparkly!


~Kelly
Pin It

Friday, December 20, 2013

Be decorating...

 
Sometimes tags are just too pretty to put on a gift and then throw away.  Sometimes tags are just too pretty to put on a gift at all.  That is when they end up on the tree as ornaments! 
 
I had every intention of using these Linnie Blooms canvas tags as gift tags, but once I started playing, I just couldn't give them up on a gift, so onto my tree they went!
 
I added strips of washi tape to the tags, and then painted them with a layer of Modge Podge to seal the edges of the tape from lifting.  I painted the tree and stars with acrylic paint and "decorated" with Stickles for extra sparkle.  There can never be too much sparkle at Christmas time!
 
I added some musicality with these alphabet letter stickers from Cosmo Cricket and then strung some seed beads on wire to make them easy to hang.  These are so quick and easy that I will make some more.  Maybe, the next ones I make I'll be willing to part with.  Maybe.
 
 
Wishing you the happiest of times this Christmas season!
Kelly

Tuesday, November 26, 2013

Be wrapped in love...


I do not like to shop.
There, I said it.
I'll say it again.
I do not like to shop.
However, I do like finding the perfect gift for someone. And because I do not shop often, I browse for good gifts all year long. Sometimes, that perfect gift is a gift card (like to their favorite scrapbook store...hint, hint). And, while a gift card may sometimes seem impersonal, when it's wrapped with something hand-made, it seems to be wrapped with love.


The Linnie Blooms shop is full of some new fun holiday shapes, and this stocking is perfect for a stocking stuffer (it doubles as an ornament too).
First, I took out a white crayon and freehand drew some zig-zag shapes on 2 of the Linnie Blooms Canvas Stockings.


With a little bit of Distress Ink and some water, I painted over those zig-zags (one side is Festive Berries and the other side is Evergreen Bough). The white crayon acts as a resist.


Then, I used Tacky Glue to line the edge of one of the stockings and glued them together.


Next came the fun, embellishing part. I glued a thick, furry felt as the top of the stockings and rubbed in some Rock Candy Stickles. I added silver glitter glue as stitches on the toes and heels. I went outside and clipped my spirea shrubs to get some natural sticks that I added to some silver berries and wrapped them in a bundle with some twine. Some Copic-colored Linnie Blooms leaves top it off.


And look...it's the PERFECT size for a gift card!
So don't despair if you don't find that perfect gift...
wrap it in LOVE...then it is perfect!
~Kelly


www.pinterest.com


Thursday, February 28, 2013

Be a light...


Maybe because it is in the name of our parish, Lumen Christi,  but I am drawn to the light.  I always pay special attention to phrases, poems, and Bible verses that contain the word "light".  It is like God is constantly reminding me about light.  Without looking for it, it seems to follow me. 

Today, I made a page about one of the lights in my life.  Actually, 4 lights in my life.  This is one of those moments where they were all happily playing and being silly while they decorated the Christmas tree.  Peacefully. 

I don't always use a full sheet of busy patterned paper for a background, but somehow this seemed to work.  I don't think I've ever created a red and turquoise Christmas page either.  I don't think I've created any page with red and turquoise...it's an interesting color combo.  Somehow it seemed to work.

Your word is a lamp to my feet and a light for my path.
Psalm 119:105
 
 
~Kelly
Pin It

Monday, December 10, 2012

Whatever is given...

Just a quick "note" to send you over to the Chicagoland Scrapbooker blog today.  The other design team members and I have some quick creations that will make great teacher gifts.

I gave some cute snowman notepads an extreme makeover by using layers, snowflake die cuts, brads, border punches, and ribbon to give them a home.  Here's a tip--cereal boxes are a great source of chipboard.

Hope you are in the home stretch of gifts you still need to make.  Hope you get to enjoy this special time of year.


~Kelly

Pin It

Thursday, December 22, 2011

Pinecones for the Tree


Even if the gift inside the box is store-bought, having a little home-made topper can make a good present, extra-special. These pinecone ornaments are just perfect for that. I learned to make them ages ago, and decided to add a few new ones to my collection this year.  For the ornament above, I used paper from Bella Blvd.'s new Winter Wonder collection, called Ski Slopes.

To make your own, you will need...
-a small styrofoam egg
-pins
-paper (or ribbon) cut into 1" wide strips, then cut into 1 1/2" long 
 pieces. You will use about six, 1 inch strips.
-ribbon
-tacky glue
Fold the rectangles of paper to a point (not true triangles), as seen in the photo. Place each folded paper onto the egg, pinning at the two top corners. 


The key to getting the pinecone shape started, is to pin 3 of the folded rectangles so their bottom points meet at the bottom of the egg (you can see this in the picture below). Then, you just keep going around pinning the pieces at each corner, covering the pins of the row underneath as you go. 

 Once you get to the top, slide the pins under the fold (see below).
 
Loop some ribbon on a pin (I used a pearl-topped headpin for this), making your first loop a big one so you can use it for hanging on the tree.  Dip the pin in some tacky glue before sticking it into the top of the pinecone.


Here are a few I made with ribbon. They are hanging on the tree, just ready and waiting if I need to attach them to the top of a package.


I hope you have all of your shopping done and can take some time to sit back and relish in some holiday memories as they happen.  Make sure you get some photos too!

Merry Christmas and Happy New Year!


Sunday, December 11, 2011

still playing tag

So having Whooping Cough does have it's advantages. I have been able to play along with Tim Holtz's 12 Tags of Christmas. Each one has been a delight, and I have a new favorite (or 2, or 3). This one at the top is literally a "Where's Waldo" of tags. I couldn't go quite as "steampunk" as Tim's tag, but I love the hodge-podge of items. I got to color the Grinch with my Copic markers and found that all of those embellishments waiting to be used in my stash can be looked at in a whole different way when thinking Christmas.


The next tag I couldn't wait to try because of the technique for the background.  First I stamped the pattern with red, and then heat embossed with clear embossing powder.  Next, I blended in the green all over the tag (and over the red, but since it was embossed it remained prominent). I covered the whole tag in clear embossing powder (flicked some off) and then heat embossed again. This makes the red part double embossed and raised.  It reminds me of wallpaper and has a texture you just want to touch. 

I didn't have any of the Candlestick dies he used, so I die-cut some flourishes and put them together to create a custom candle-stick holder.  Using glossy accents randomly on the candle makes it look like it's dripping wax. 

I just love the traditional colors on this one!


 This last tag was putzy.  Creating those ornaments was a lot of work but such a great technique transferring the paper image onto packing tape.  Go watch his instructions:  www.timholtz.typepad.com


It truly gives you the look of vintage ornaments. 


December is going by quickly. 

 BELIEVE
 that you can enjoy the holiday and its celebrations
while still trying to get all you can on your "to do" list.


Friday, December 9, 2011

Before and After Gift Bag


If you are like me, you don't like to throw away those cute shopping bags that stores give you this time of year. The problem is, I don't want the store's GIANT logo across the bag if I am going to give it to someone else (especially if the gift inside isn't from that store). So, I give you before and after.


First, I used some Distress Inks to "grunge" up the bag a little big. The white was just a little too stark for the images I was going to be adding. I then covered the logo with hunter green cardstock that I punched with a border punch on all 4 sides (this is an adorable Fiskars border punch with a row of evergreens. It's from last year's Limited Winter Edition.). I used some white dabber paint to make snow on the trees. Lastly, I used Versamark ink to stamp on some shadow-effect snowflakes.

I cut out some images from an old Die Cuts with A View Christmas pack. I cut out each image twice and trimmed one. With some pop-dots underneath, I raised the smaller image and affixed it to the larger one to give it a shadow-box effect. I dabbed on some white paint around all of the edge and embellished with Stickles. Everything looks better with some Stickles, don't you think?